How to Edit an Existing Bill of Materials (BOM) for a Page
This article describes the steps to edit an existing Bill of Materials (BOM) for an interactive Parts Page in Documoto.
Article Topics
- BOM Editing Considerations & Best Practices
- Options to Edit an Existing BOM
- How to Edit Existing BOM Rows
- How to Override an Existing BOM
- How to Merge an Existing BOM with an Imported BOM
BOM Editing Considerations & Best Practices
Prior to edit an existing BOM for a Parts Page, please consider the following:
- BOM data cannot be copy and pasted or imported directly from PDF or non-delimited sources.
- If you plan to copy and paste BOM data, verify that the clipboard is enabled for your web browser. For more information, please refer to this article: Enabling Clipboard for BOM Import.
- As a best practice, always enable the Lookup/Load Parts from Documoto on Import setting to ensure that existing Part data in Documoto, including Translations, Tags, and Hotpoint Links, is retained.
- By default, upon publishing new Parts Pages from Page Builder, Documoto will always overwrite existing Part Name Translation(s) with the latest Part Name Translation(s) included in the BOM. If you would do not want the imported BOM data to overwrite the existing Part Name Translations you manage in Documoto, Documoto can enable a Lock Part Translations on Publish system setting for you.
Options to Edit an Existing BOM
Within Page Builder, there are three options to edit an existing BOM for a Parts Page:
- Update, add, and/or delete individual BOM rows
- Use the Override option to replace the existing BOM and import a new/updated BOM
- Use the Merge option to merge the existing BOM with the imported BOM.
Each option is described in detail below.
How to Edit Existing BOM Rows
- In the Admin Center, go to Content > Pages.
- Search for and select the Page you wish to edit the existing BOM for.
- Click Page Builder.
- To verify BOM List Settings, click on the 'Cog'
 icon on the BOM tab.
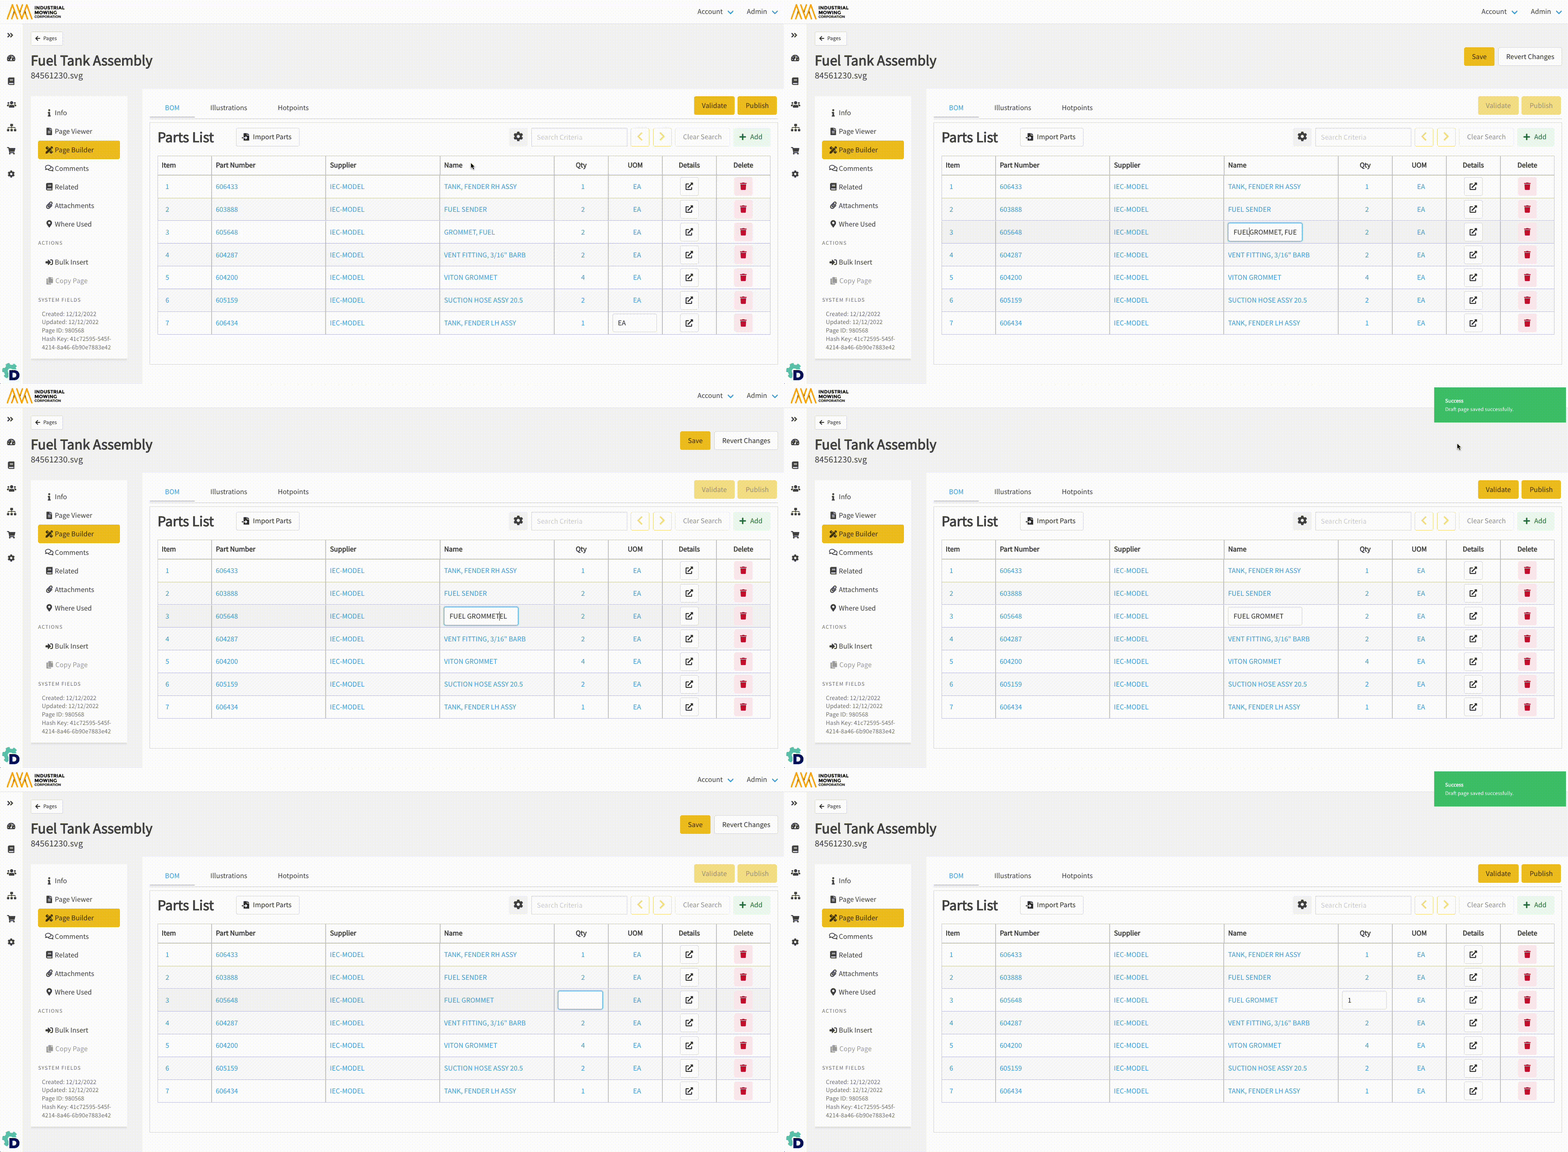
 - To update an existing BOM row, click into the field(s) you wish to edit and make desired edits.
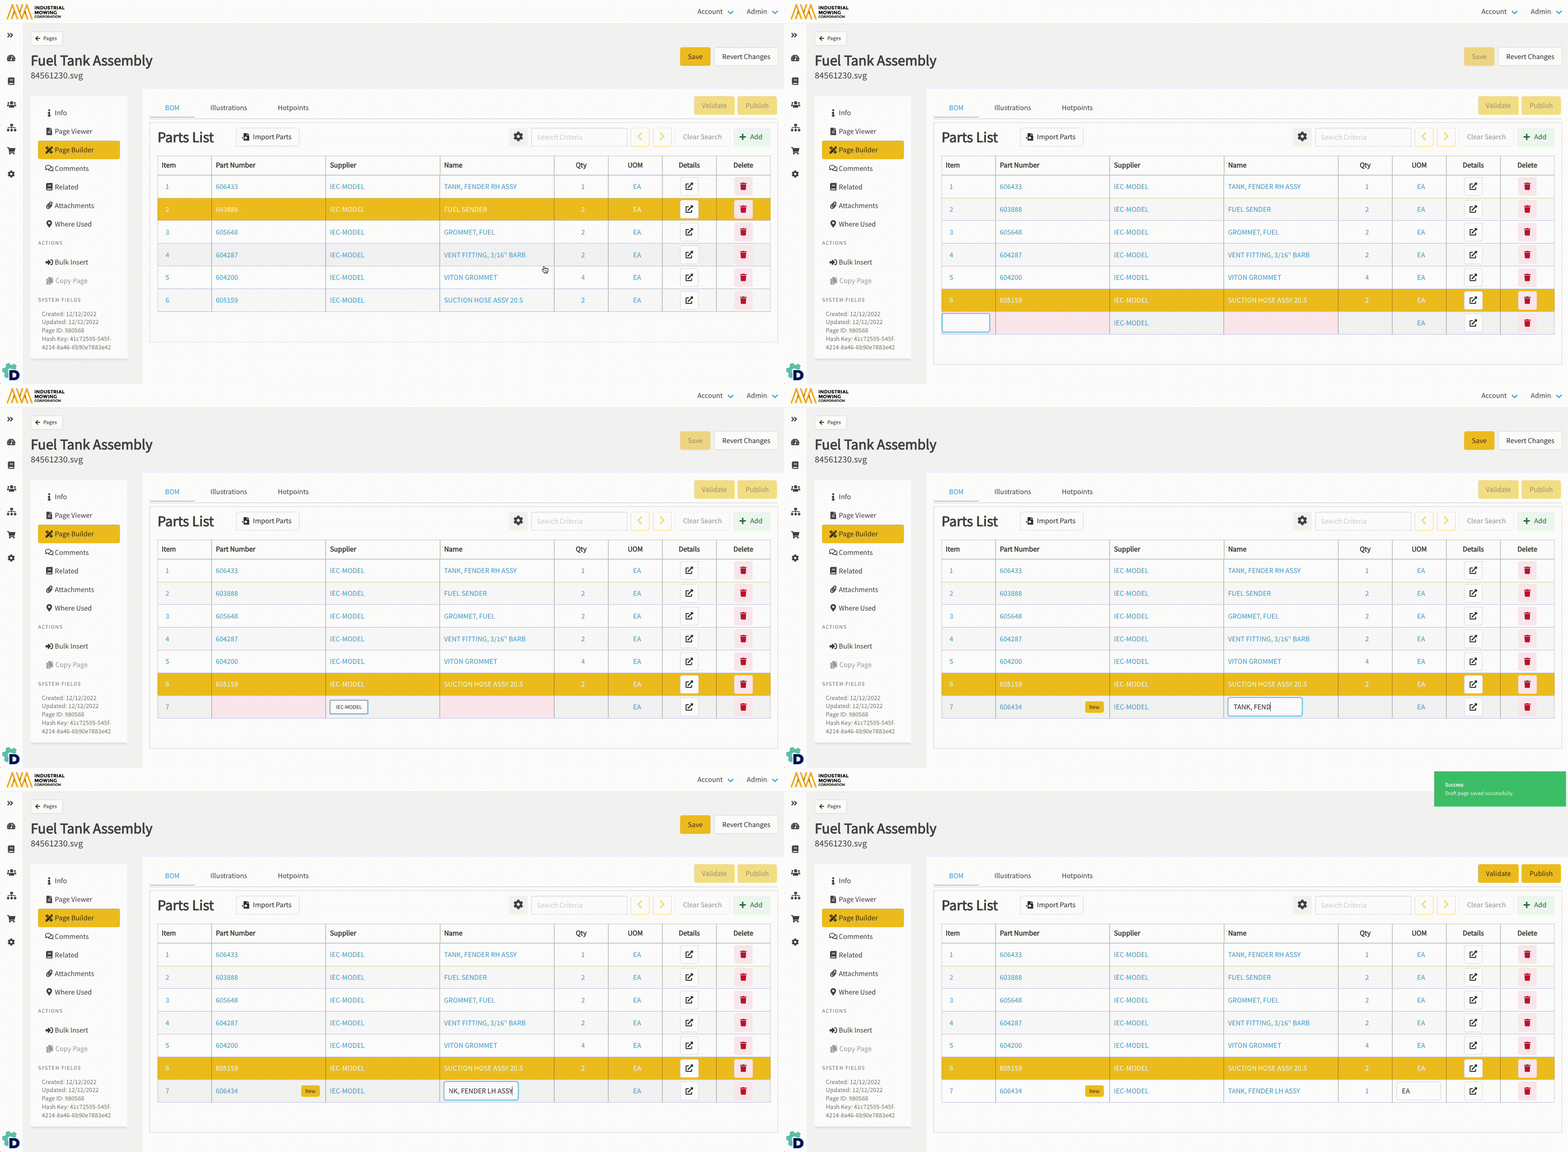
- To add a BOM row, click + Add and input the required fields.
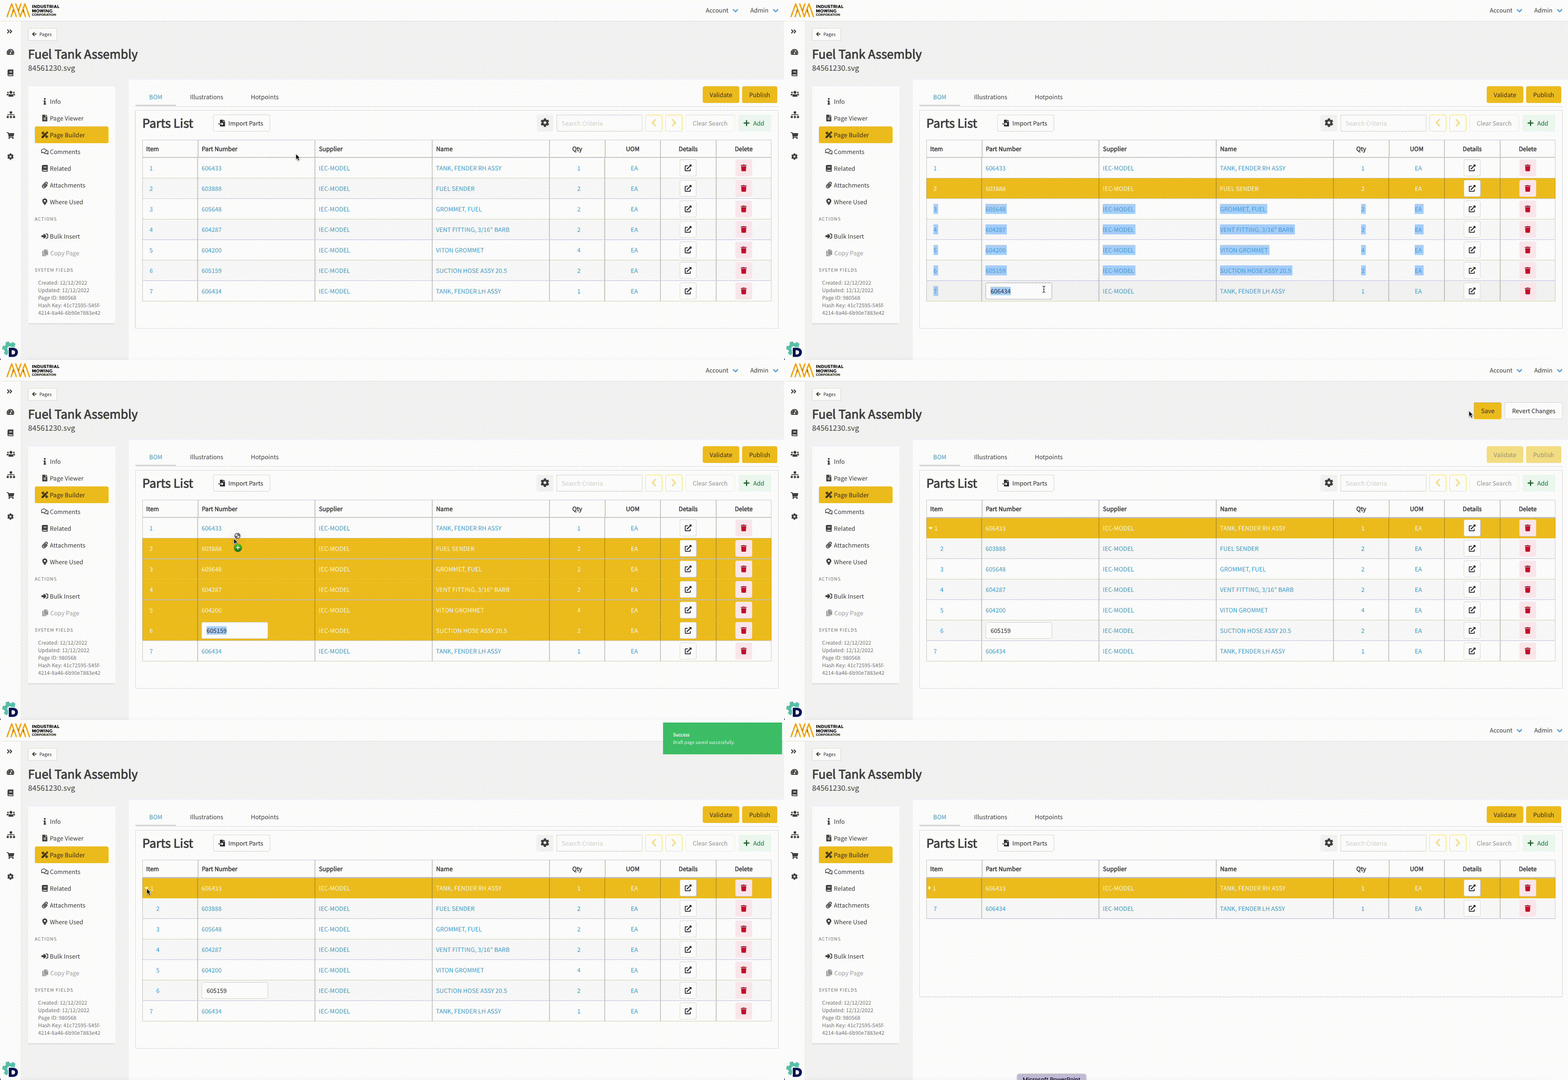
- To create an assembly or visual indentation of Parts within the BOM, select the sub-assembly BOM row(s) and drop the row(s) on top of the parent assembly BOM row. Note: To select multiple, adjacent rows hold the Shift key and click on the desired children rows before dragging and dropping them on the parent row.
8. To rearrange the BOM rows, drag and drop BOM rows, as needed. 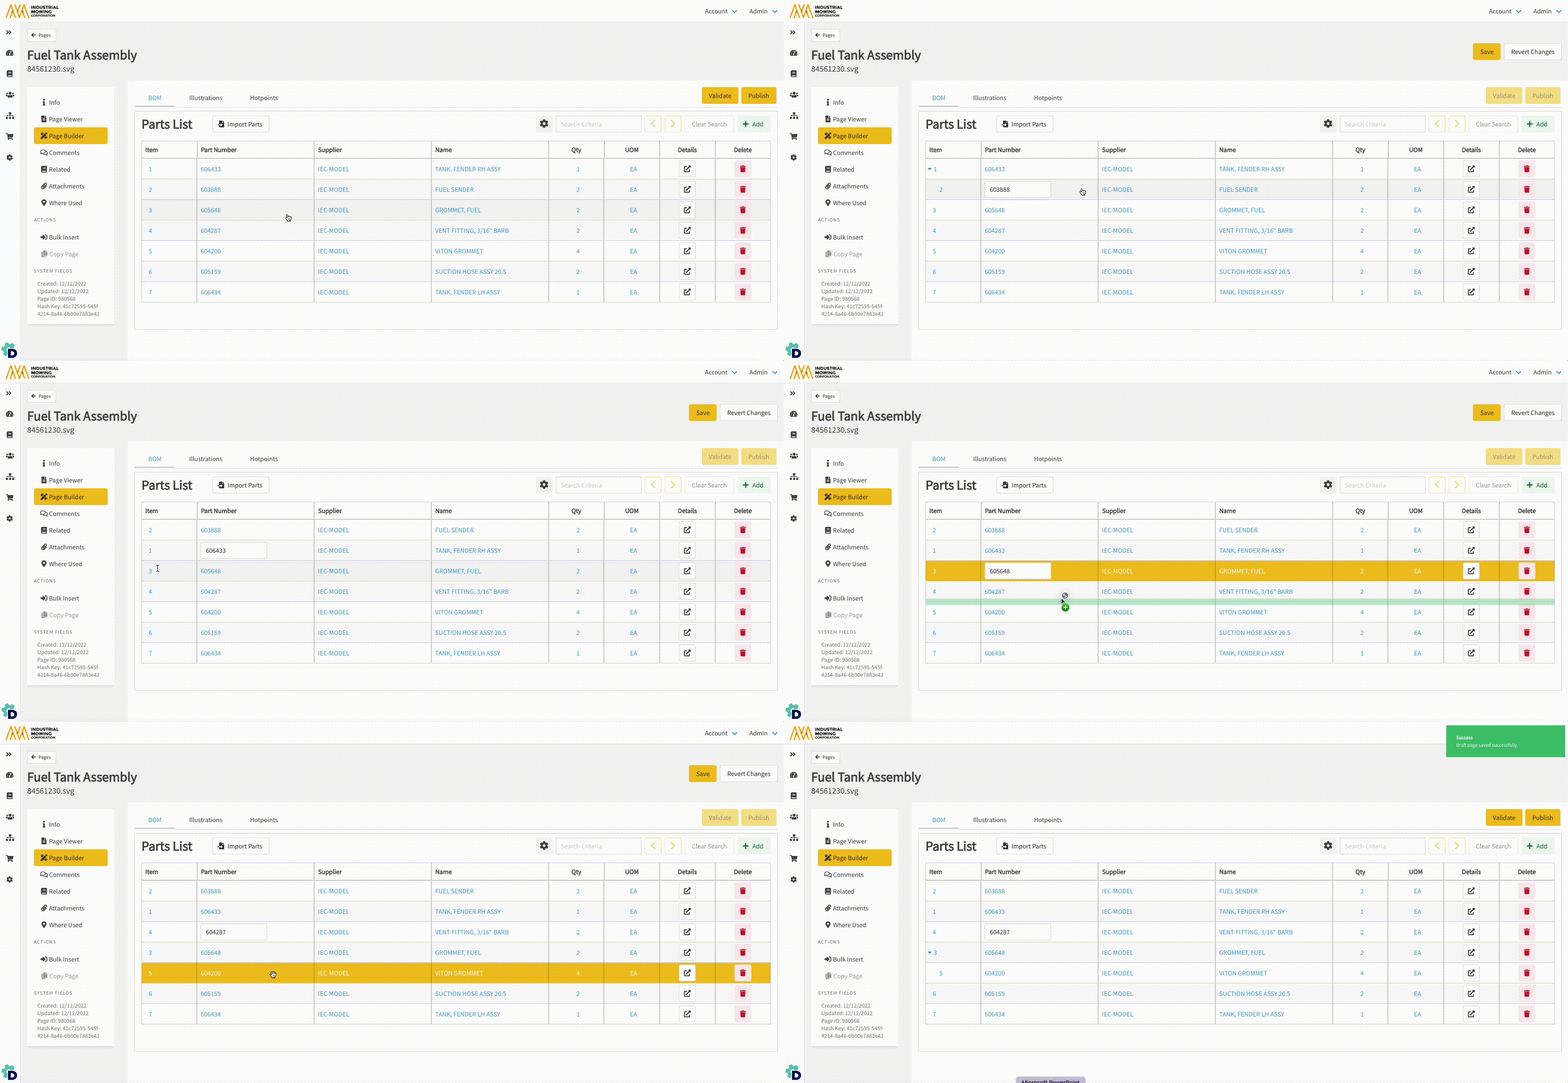
9. To delete a BOM row, click the Trash Can icon and then Delete. 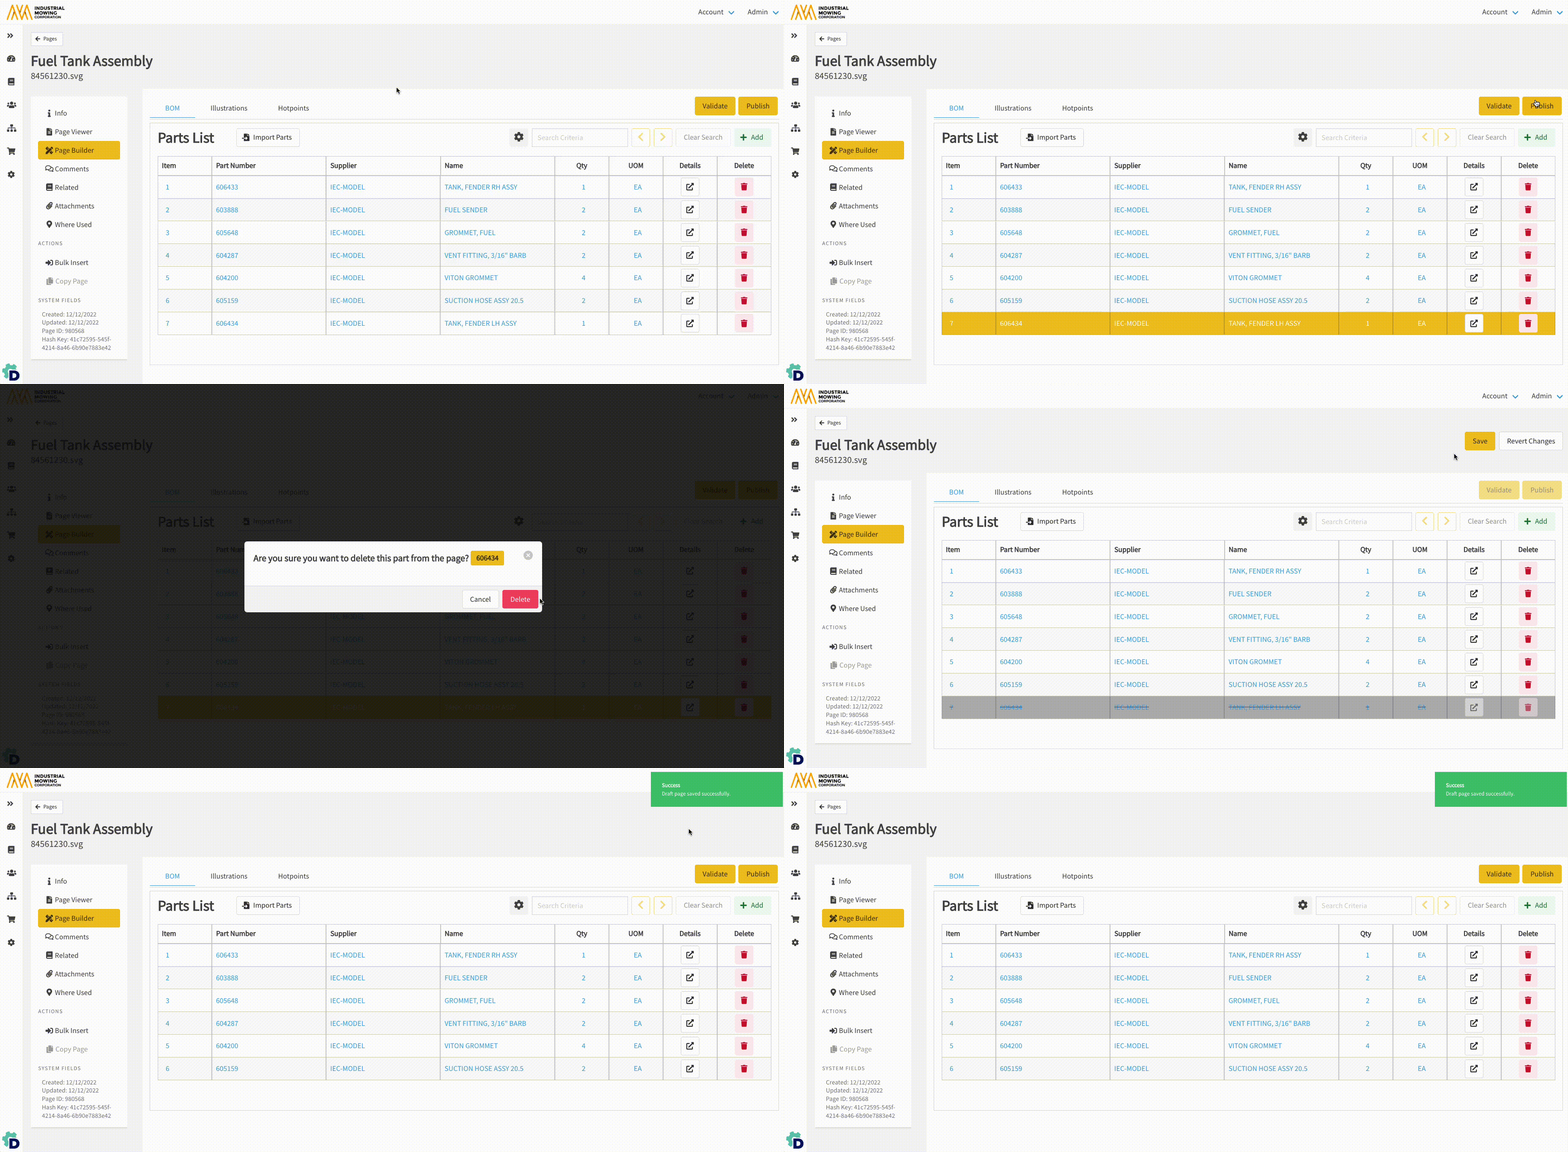
10. Click Save
How to Override an Existing BOM
When importing a BOM for an existing Parts Page, Override can be used to replace the Page's entire existing BOM with the imported BOM. In general, a BOM Override is used when the entire assembly is superseded or revised.
- In the Admin Center, go to Content > Pages.
- Search for and select the Page you wish to Override the existing BOM for.
- Click Page Builder.
- To verify BOM List Settings, click on the 'Cog'
 icon on the BOM tab.
 - Click the Import Parts button.
- The Import Parts slider will appear on the right.
- Under Input Source, select Clipboard or Text File (CSV, TXT) to input source data.
- Under BOM List Options, select Override.
- Under BOM List Options, ensure the Lookup/Load Parts from Documoto on Import checkbox is enabled.
- NOTE: if the Lookup/Load Parts from Documoto on Import checkbox is not enabled, Part data that exists in Documoto will not be loaded to the BOM - which may result in the Publisher unintentionally wiping out existing Part data, such as Tags and Hotpoint Links, upon publishing the Page.
- In the Data Mapping/Sample Data table, click on any fields in the Column Name column that indicate **Not Mapped** and map them to an available Documoto field name using the drop-down menu.
- NOTE: be sure to enable the Contains Header Row checkbox if your BOM table includes column headers.
- Verify that all Column Names have been mapped to the appropriate Sample Data using the directional arrows to preview up to 10 rows of BOM data. Update any Columns Names, as needed.
- Click Submit to import the BOM.
- NOTE: if the Submit button is disabled, ensure that all Column Names are mapped.
- Ident or rearrange BOM rows, as needed.
- Click Save.
How to Merge an Existing BOM with an Imported BOM
When importing a BOM for an existing Parts Page, Merge can be used to combine the Page's existing BOM with the imported BOM. In general, a Merge is typically used when a BOM needs to be updated, such as updating existing Part data or adding additional BOM rows.
NOTE: when merging a BOM, Documoto performs intelligent matching to identify if new BOM rows need to be added. Documoto will check the existing BOM for any Item Number + Part Number + Supplier Key mappings. If any matches exist, Documoto will enrich the Part row that already exists in the BOM with any new data that is being imported for that row. When there are no Item Number + Part Number + Supplier Key
matches in the existing BOM, new BOM rows will automatically be added to the bottom of the existing Page's BOM.
- In the Admin Center, go to Content > Pages.
- Search for and select the Page you wish to Merge the existing BOM for.
- Click Page Builder.
- To verify BOM List Settings, click on the 'Cog'
 icon on the BOM tab.
 - Click the Import Parts button.
- The Import Parts slider will appear on the right.
- Under Input Source, select Clipboard or Text File (CSV, TXT) to input source data.
- Under BOM List Options, select Merge.
- Under BOM List Options, ensure the Lookup/Load Parts from Documoto on Import checkbox is enabled.
- NOTE: if the Lookup/Load Parts from Documoto on Import checkbox is not enabled, Part data that exists in Documoto will not be loaded to the BOM - which may result in the Publisher unintentionally wiping out existing Part data, such as Tags and Hotpoint Links, upon publishing the Page.
- In the Data Mapping/Sample Data table, click on any fields in the Column Name column that indicate **Not Mapped** and map them to an available Documoto field name using the drop-down menu.
- NOTE: be sure to enable the Contains Header Row checkbox if your BOM table includes column headers.
- Verify that all Column Names have been mapped to the appropriate Sample Data using the directional arrows to preview up to 10 rows of BOM data. Update any Columns Names, as needed.
- Click Submit to import the BOM.
- NOTE: if the Submit button is disabled, ensure that all Column Names are mapped.
- Ident or rearrange BOM rows, as needed.
- Click Save.
