How to Supersede a Part Number
Occasionally a part changes in material, function, etc. prompting a change to the part number and, in turn, a change in all Parts Books where the part is used.
This article describes how to use part supersession to replace an old part number with one, or more, new part number(s) and reflect the update across all Parts Books where the part was used. Users can still search for superseded part number(s) to find the new part(s), as the previous part number is added as a tag to the new part number(s) after being superseded.
This action is irreversible. The original part will be deleted from the system upon completion of the supersede action.
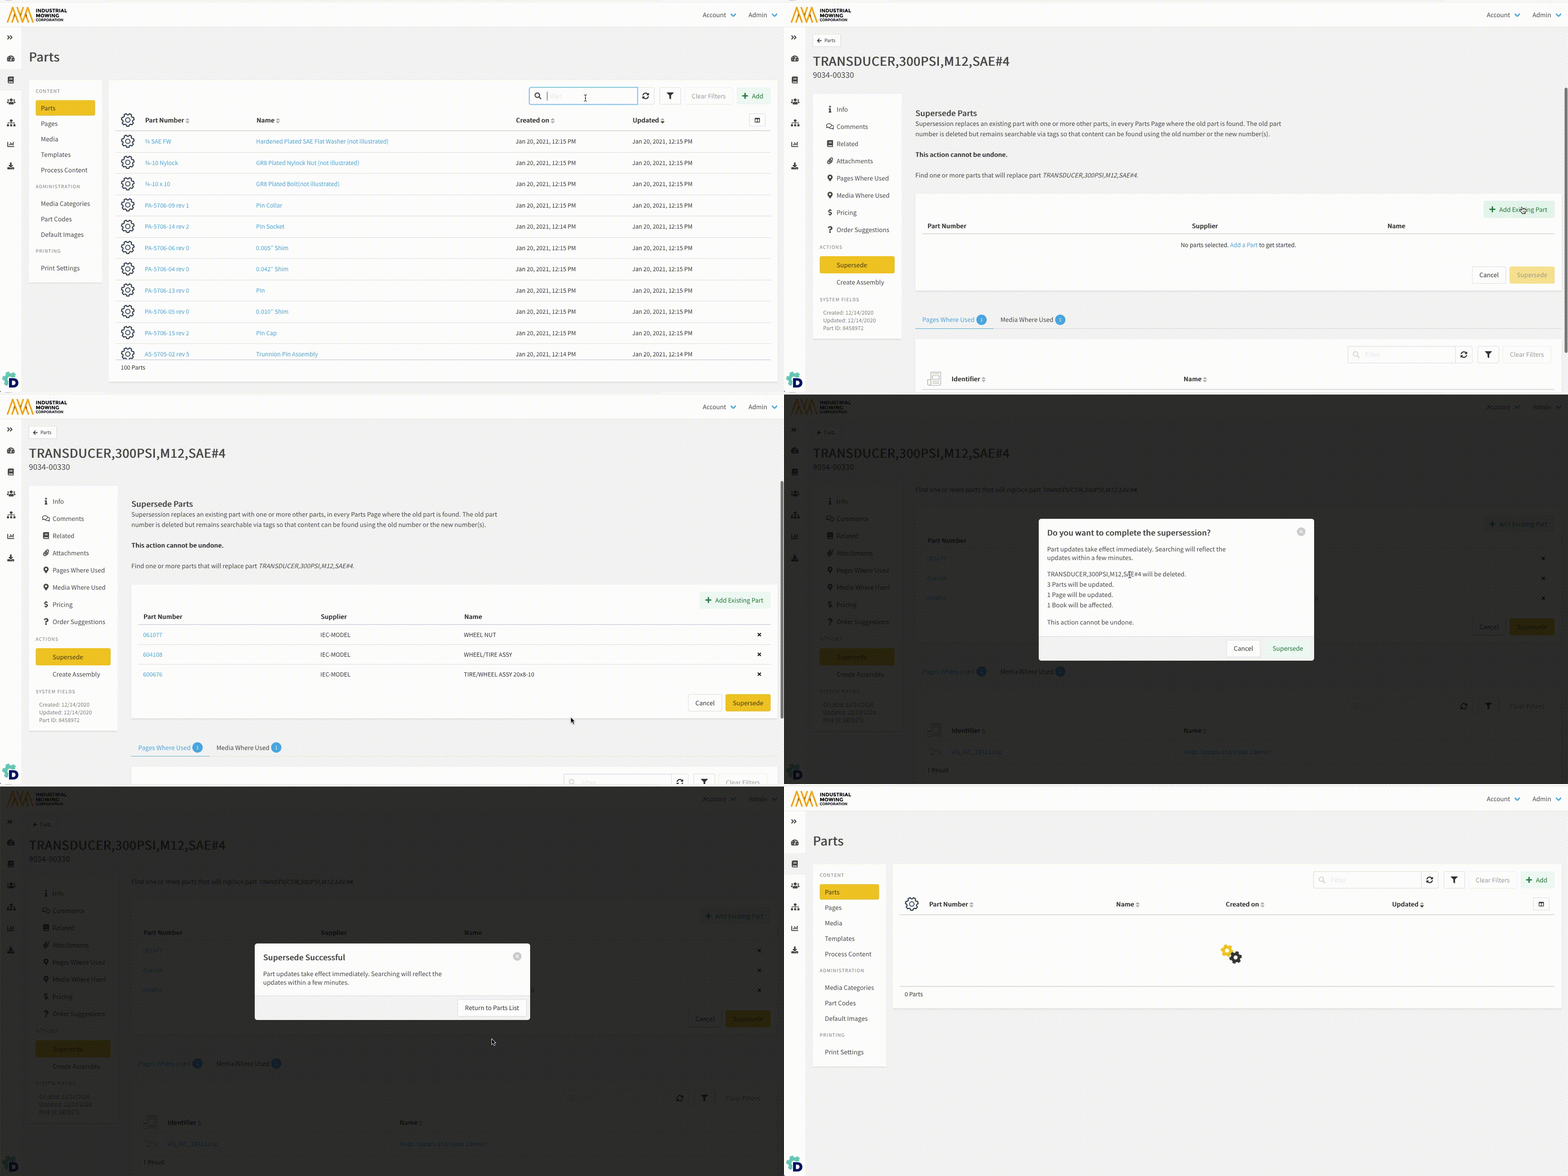
Within Documoto Admin go to Content > Parts.
- Search for and select the part.
- Click Supersede from the left navigation menu.
- Click + Add Existing Part.
- Search for the parts you wish to supersede the current part with.
- Select the part(s) by clicking on them or selecting the checkbox next to them.
- Click Select to add the parts but remain in the parts selector modal to search and add any additional parts needed.
- Click Select and Close to add the parts and return to the Supersede editor.
- Click Supersede.
- Review the confirmation details and then click Supersede to complete the action.
- Click Return to Parts List.

Once the supersession is complete, Documoto will automatically apply a part tag called "Superseded Part Number" to the new part number with its value being the original/old part number.
Hotpoint links tied to BOM row items that were previously hotpoint linked for the superseded part number will also be retained.
