
This article describes how to edit or update an Illustration for a Page, as well as the functionality of each tool within the Illustrations toolbar and best practices.
Article Topics
- Illustrations Tools
- Illustrations Modification Considerations
- Illustration Modification Best Practices
- How to Use the Line Tool
- How to Use the Shape Tool
- How to Use the Text Tool
Illustrations Tools
The Illustrations toolbar includes three types of tools:
- Line Tool: used to add lines to a illustration
- Shape Tool: used to add shapes (rectangle and/or square) to a illustration
- Text Tool: used to add text to a illustration
Illustrations Toolbar
| Button | Purpose |
| Resets the illustration view size to fit the screen | |
| Zoom in on illustration | |
| Zoom out on illustration | |
| Add line to illustration | |
| Add shape to illustration | |
| Add text to illustration |
Each tool is detailed below.
Illustrations Modification Considerations
- As a best practice, edit or update a Illustration in the source system it was generated in, such as CAD
- Once an Illustration addition (e.g. line, shape or text) is saved, it will be permanently incorporated into the Illustration
- Illustration additions (e.g. line, shape or text) can only be edited or deleted if there is a grey box around the element - see screenshot below
- If needed, Documoto's Illustration editing tools (e.g. lines, shapes, and text) can be leveraged to create callouts on an Illustration
Illustration Modification Best Practices
Line Tool Best Practices
- Used to add line(s) to an existing Illustration
- Typically used to add a line from the exploded drawing to a callout
- To select, resize, move, or delete a line, unselect the 'Line Tool' icon and update, as needed
Shape Tool Best Practices
- Used to add a shape (circle or rectangle) to an existing Illustration
- Typically used to add shapes around numerical callouts or cover superfluous information, such as a BOM, header/footer information or notes
- Publishers can cover or erase unwanted areas of the Illustration using a shape with a White (#FFFFFF) Fill and White (#FFFFFF) Stroke
- A rectangle shape can used as textbox or border for text added to an Illustration
- To select, resize, move, or delete a shape, unselect the 'Shape Tool' icon and update, as needed
Text Tool Best Practices
- Used to add text to an Illustration
- Before adding text to an Illustration, consider if the information is likely to change
- If yes, consider using Comments to capture information that is specific to the Page or individual Parts
- The textbox is stationary until the 'Text Tool' icon is no longer selected
- While the 'Text Tool' icon is selected, text cannot be added on top of shapes on the Illustration
- To select, resize, move, or delete text, unselect the 'Text Tool' icon and update, as needed
How to Use the Line Tool
- Within Documoto Admin, go to Content > Pages.
- Search for and select the Page with an Illustration(s) you wish to edit or update.
- Click Page Builder.
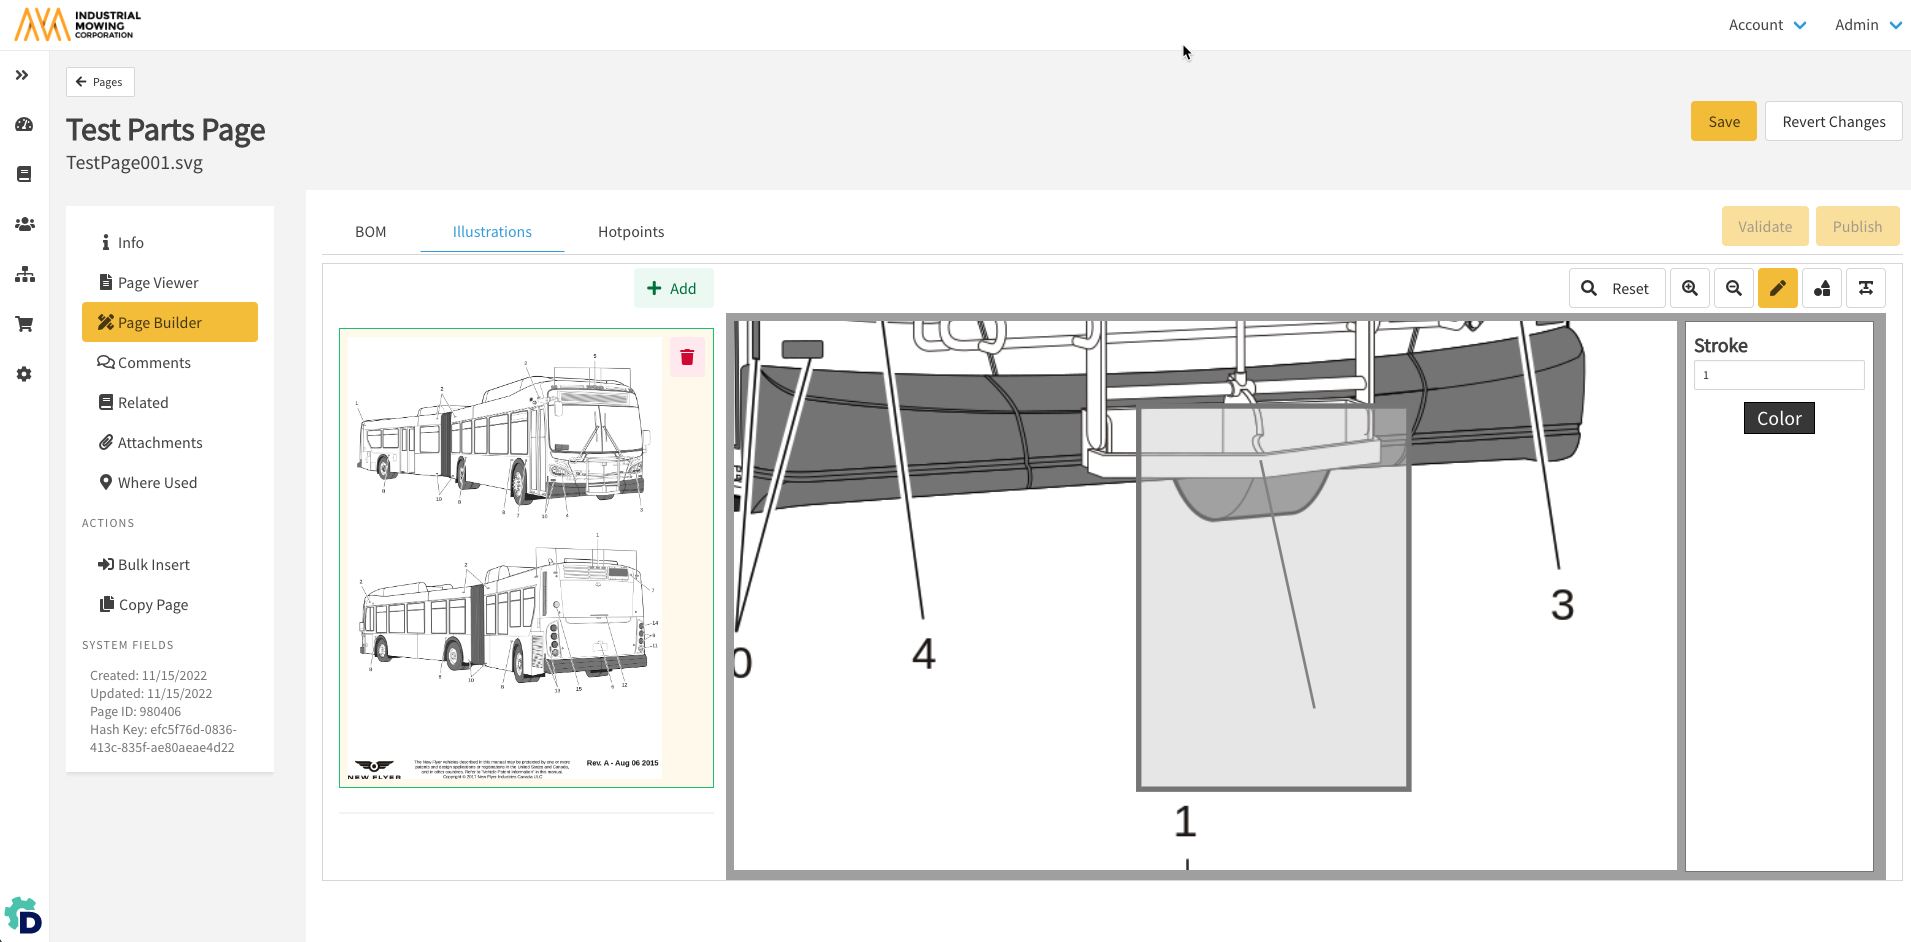
- Click the 'Line Tool' icon.
- Input a Stroke value to set the line weight.
- Click Color to set the line color.
-
NOTE: a Color can be defined by selecting a Styles
(Admin Center > Library > Styles) setting (e.g. Primary,
Info, Hotpoints, & Links), inputting a hex color code,
or using the color picker feature.
-
- To draw a line, click on the Illustration and hold as you drag the line to the desired length.
- To select, resize, move, or delete a line, unselect the 'Line Tool' icon and update, as needed.
- Click Save to permanently add the line to the Illustration or click Revert Changes to remove the Line.
- Click Publish to publish the Page updates.
How to Use the Shape Tool
- Within Documoto Admin, go to Content > Pages.
- Search for and select the Page with an Illustration(s) you wish to edit or update.
- Click Page Builder.
- Click the 'Shape Tool' icon.
- Select a Shape.
- Input a Border value to set the border thickness.
- Click Color to set the border color for the shape.
-
NOTE: a Color can be defined by selecting a Styles (Admin
Center > Library > Styles) setting (e.g. Primary, Info,
Hotpoints, & Links), inputting a hex color code, or
using the color picker feature.
-
- Click Fill to set the shape fill color.
- Set the Opacity of the shape using the slider.
- To add a shape, click on the Illustration where you wish the shape to start and hold until you reach the spot where you want your shape to end.
- To select, resize, move, or delete a shape, unselect the 'Shape Tool' icon and update, as needed.
- Click Save to permanently add the shape to the Illustration or click Revert Changes to remove the shape.
- Click Publish to publish the Page updates.
How to Use the Text Tool
- Within Documoto Admin, go to Content > Pages.
- Search for and select the Page with an Illustration(s) you wish to edit or update.
- Click Page Builder.
- Click the 'Text Tool' icon.
- Select a Font and Font Size.
- Optional: select a font format (bold, italize, underline) and/or alignment (left, center, right)
- Click Color to set the font color.
-
NOTE: a Color can be defined by selecting a Styles (Admin
 Center > Library > Styles) setting (e.g. Primary, Info,
Hotpoints, & Links), inputting a hex color code, or
using the color picker feature.
-
- Click on the Illustration to draw a textbox.
- NOTE: in edit mode, the textbox will appear black with a blue border.
- Input the desired text.
- Click Enter/Return to add the text.
- To select, resize, move, or delete text, unselect the 'Text Tool' icon and update, as needed.
- Click Save to permanently add the text to the Illustration or click Revert Changes to remove the text.
- Click Publish to publish the Page updates.