How to Configure the Equipment Verification Banner on Part Item Details
This article explains how to configure the Equipment Verification Banner, which appears on the Part Item Details page when users navigate directly to a Part.
Article Topics
- Overview
- How to Customize the Equipment Verification Banner
- How to Disable the Equipment Verification Banner
Overview
The Equipment Verification Banner serves as a call to action, prompting users to verify part/equipment compatibility by viewing Books and Pages the Part is found in using Where Used. By default, the banner is enabled with the following settings:
- Color: Inherits the Tenant's or Organization's Primary Color setting
- Message: "Verify this part fits your equipment"
- Button: "View Where Used"
As an admin user, you can customize the banner’s color, message, and button text, or even disable it entirely. Below are instructions for customizing each aspect of the banner.
How to Customize the Equipment Verification Banner
How to Customize Banner Color
To customize the banner color at the Tenant level, follow the steps below:
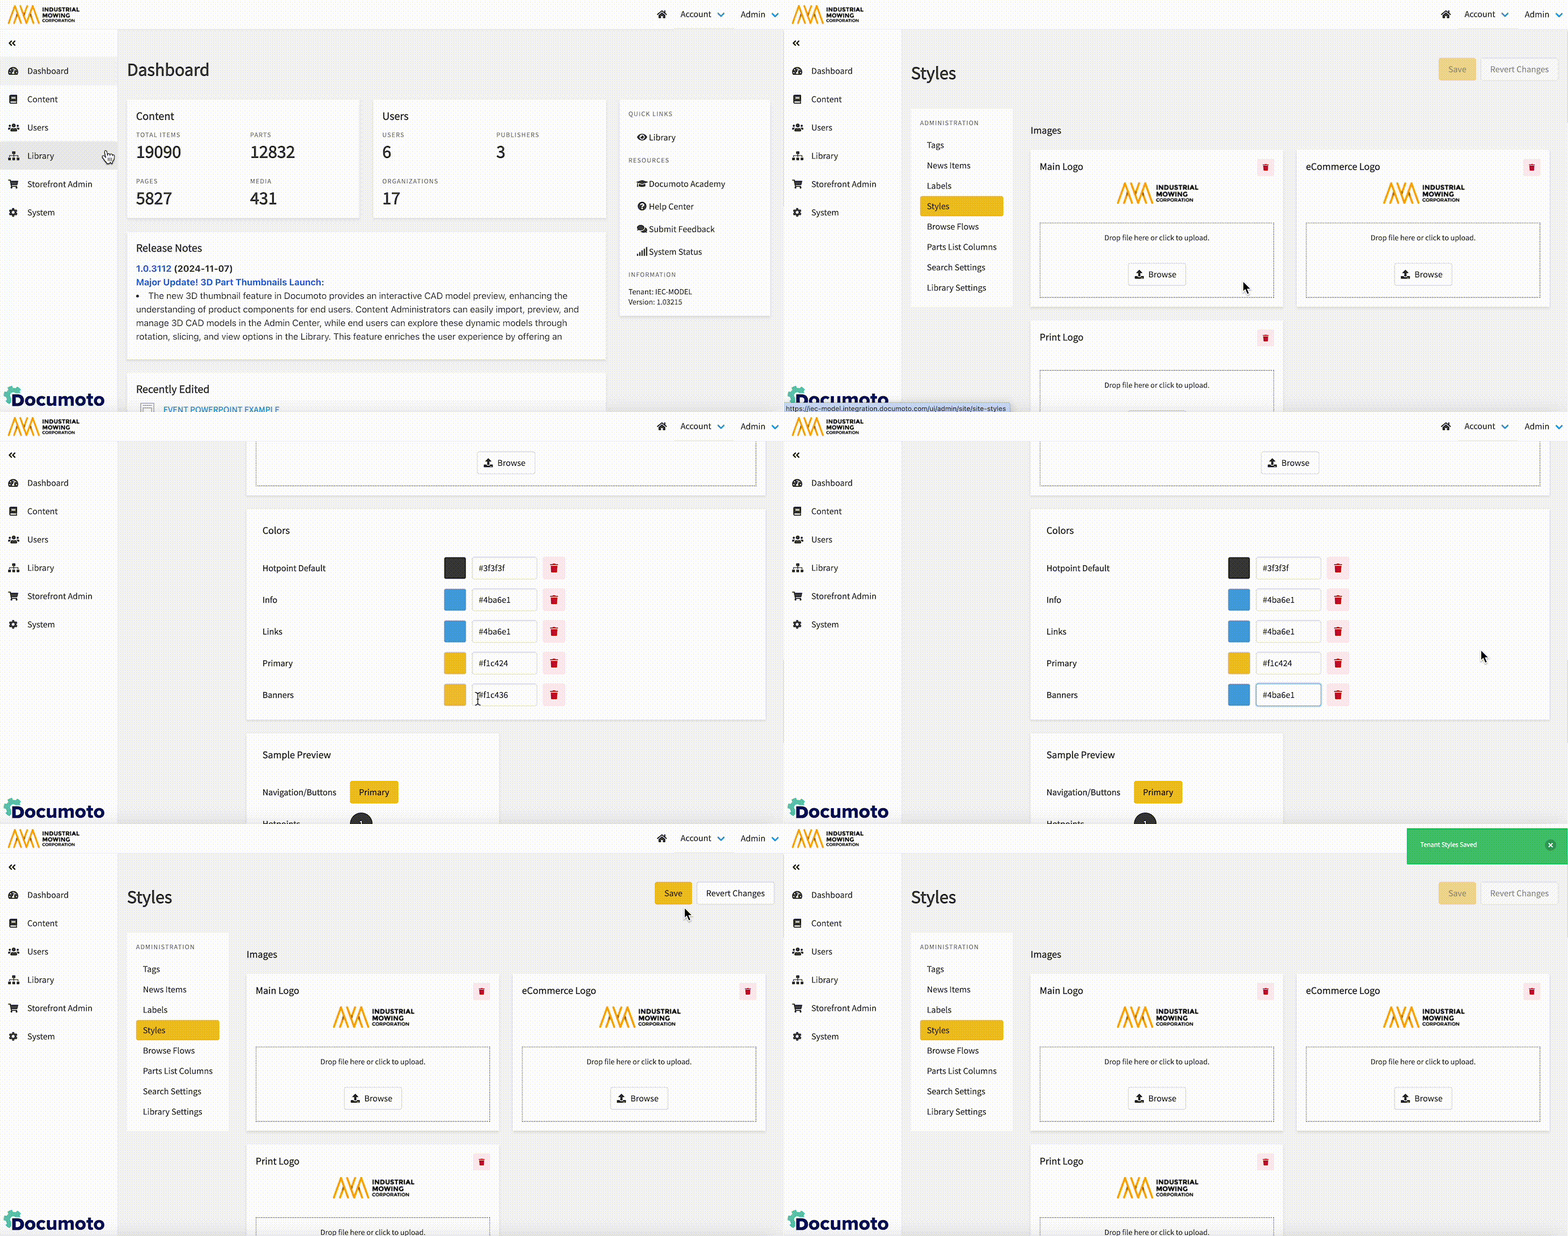
- Within the Documoto Admin Center, go to Library > Styles.
- In the Colors module, update the 'Banners' color.
- Click Save.

To customize the banner color at the Organization level, follow the steps below:
- Within the Documoto Admin Center, go to Users > Organizations.
- Search for and select the Organization you wish to customize the banner for.
- In the sub-navigation menu, click Styles.
- In the Colors modules, update the 'Banners' color.
- Click Save.
How to Customize Banner Message
To override the banner message, follow the steps below.
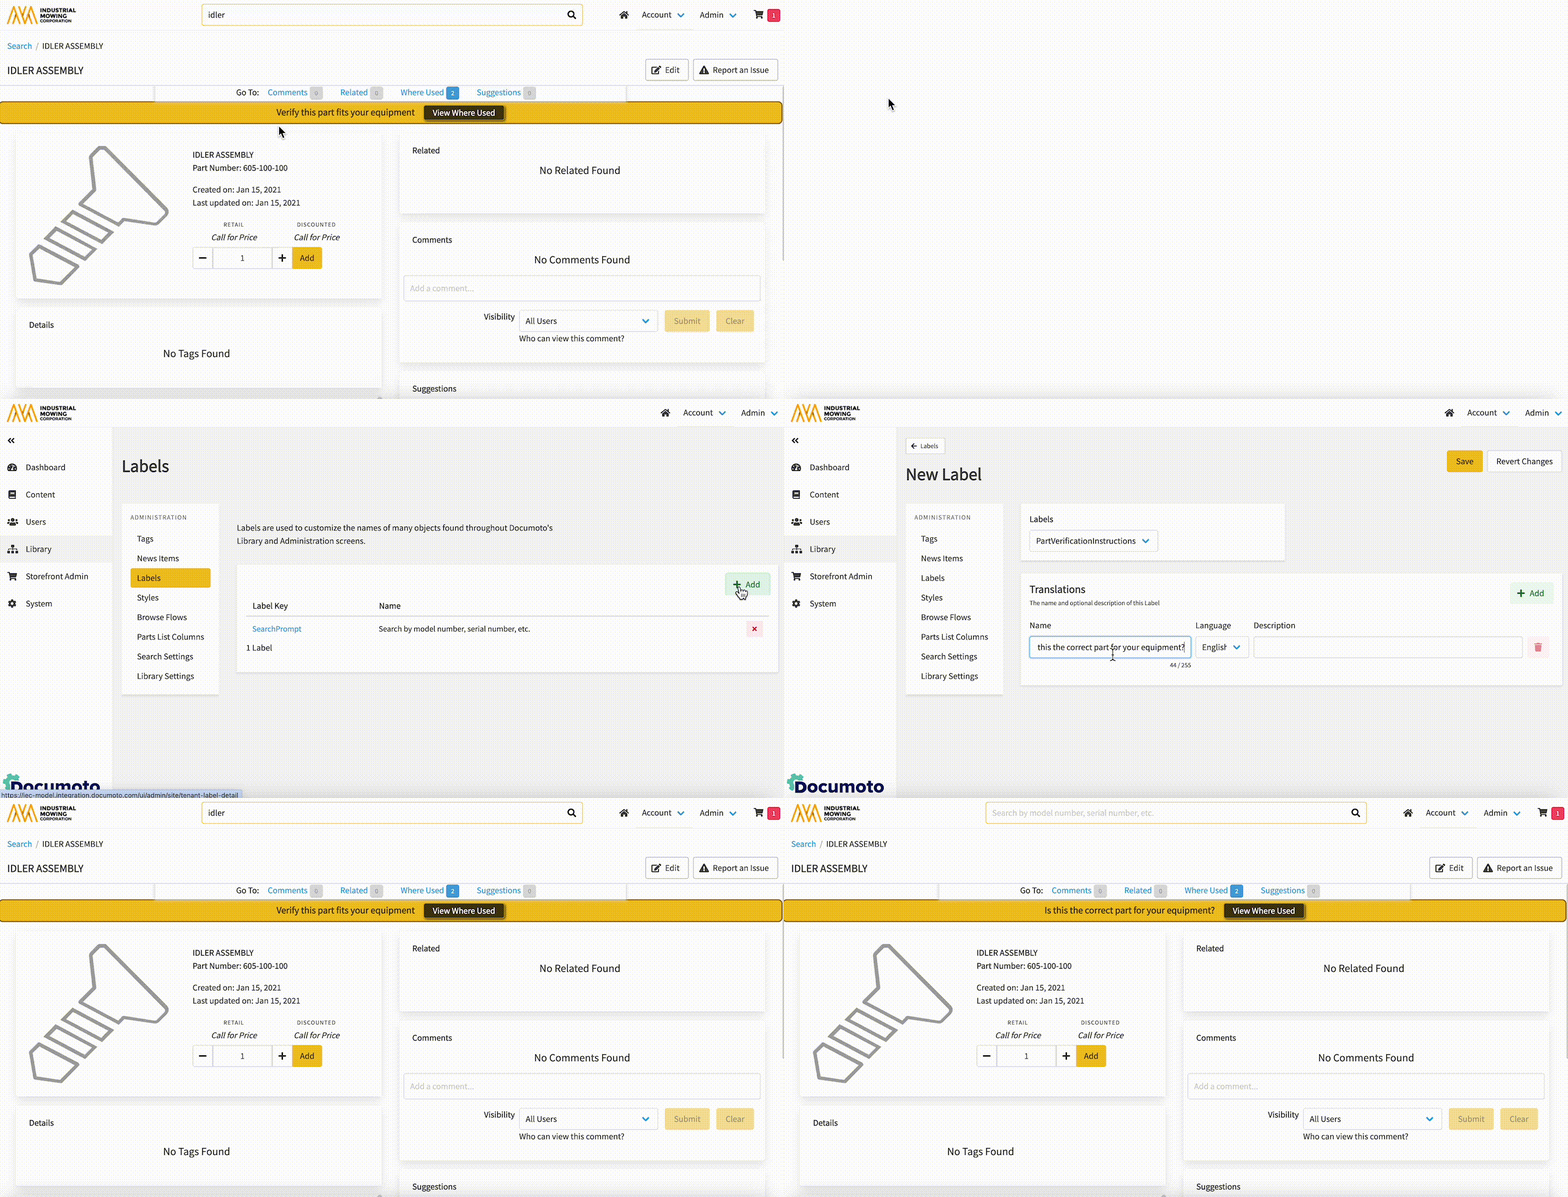
- Within the Documoto Admin Center, go to Library > Labels.
- Click +Add to create a new Label.
- From the Labels drop-down, select PartVerificationInstructions.
- In the Translations module, in the Name textfield, type the instructions for verification that you wish to appear in the banner.
- Click Save.

How to Customize Banner Button
To override the text on the banner button, follow the steps below:
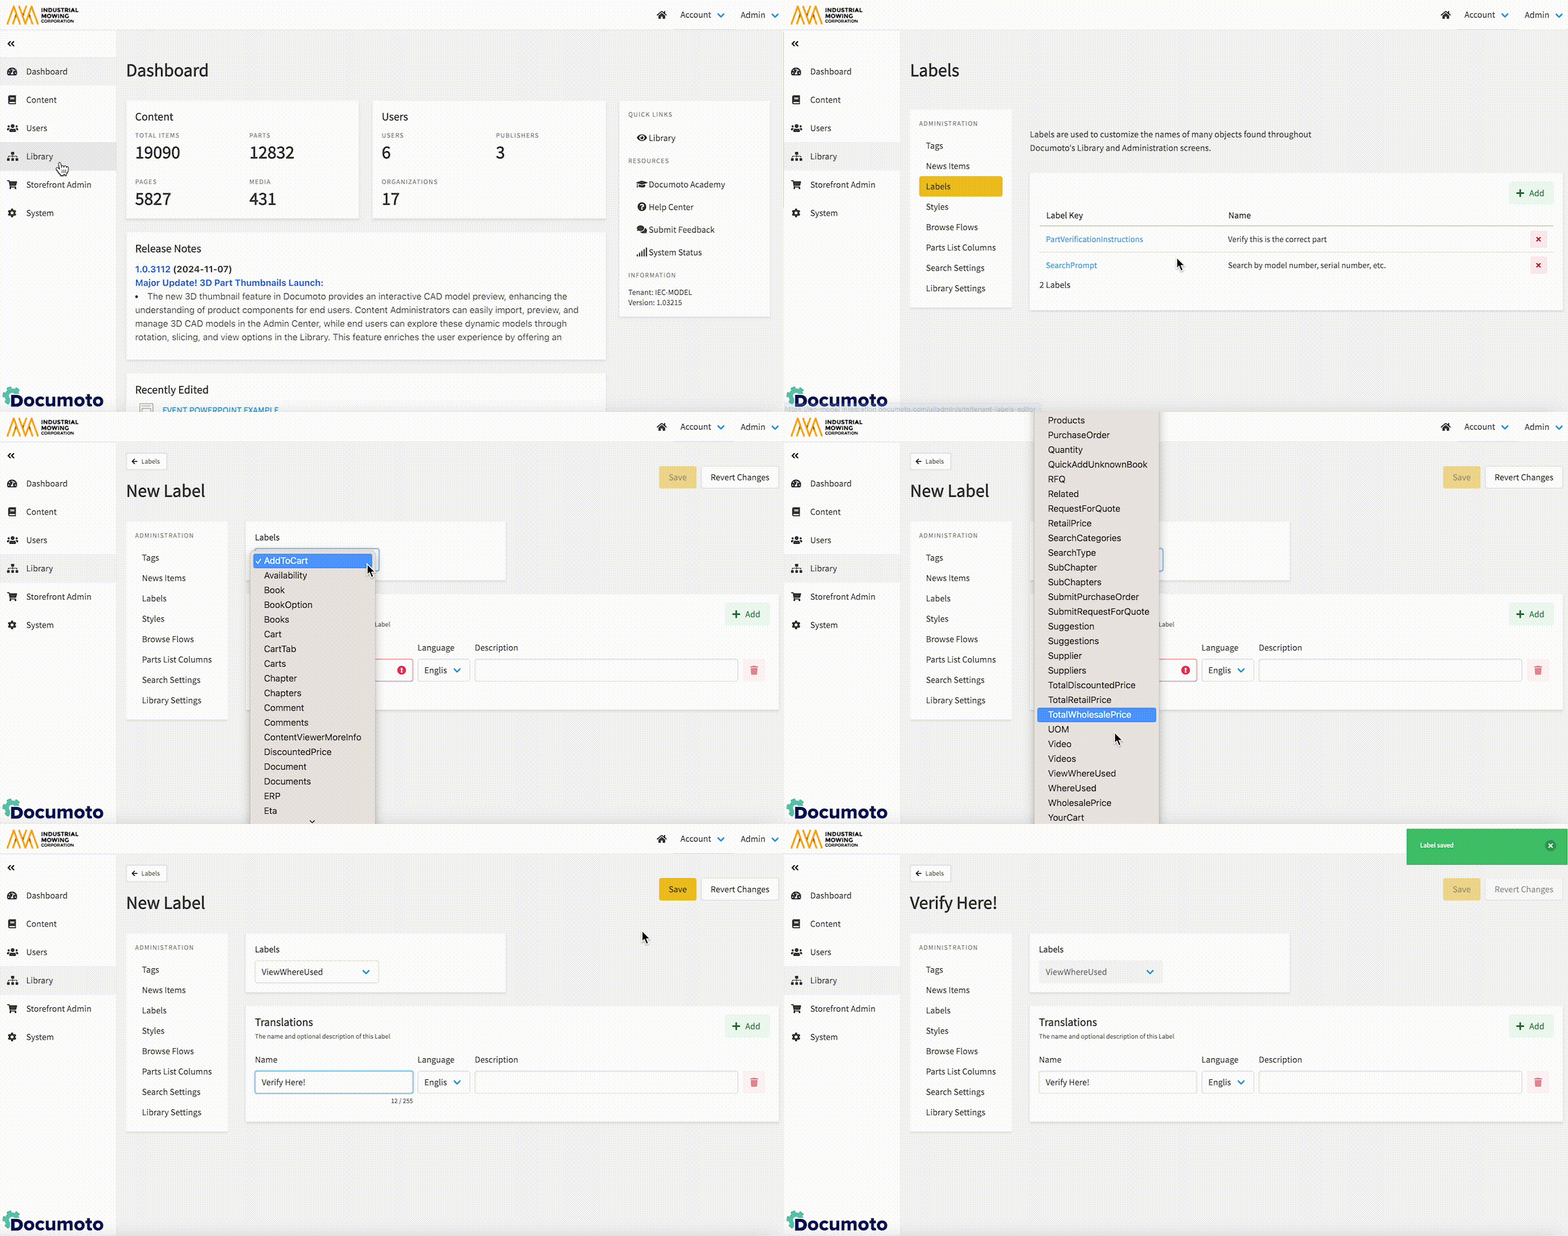
- Within the Documoto Admin Center, go to Library > Labels.
- Click +Add to create a new Label.
- From the Labels drop-down, select ViewWhereUsed .
- In the Translations module, in the Name textfield, type the instructions for verification that you wish to appear in the banner.
- Click Save.

For more information on creating and managing Labels in Documoto, please visit this Knowledge Base Article: How to Modify the Documoto User-Interface with Labels
How to Disable the Equipment Verification Banner
To disable the Equipment Verification Banner at the Tenant level, follow the steps below:
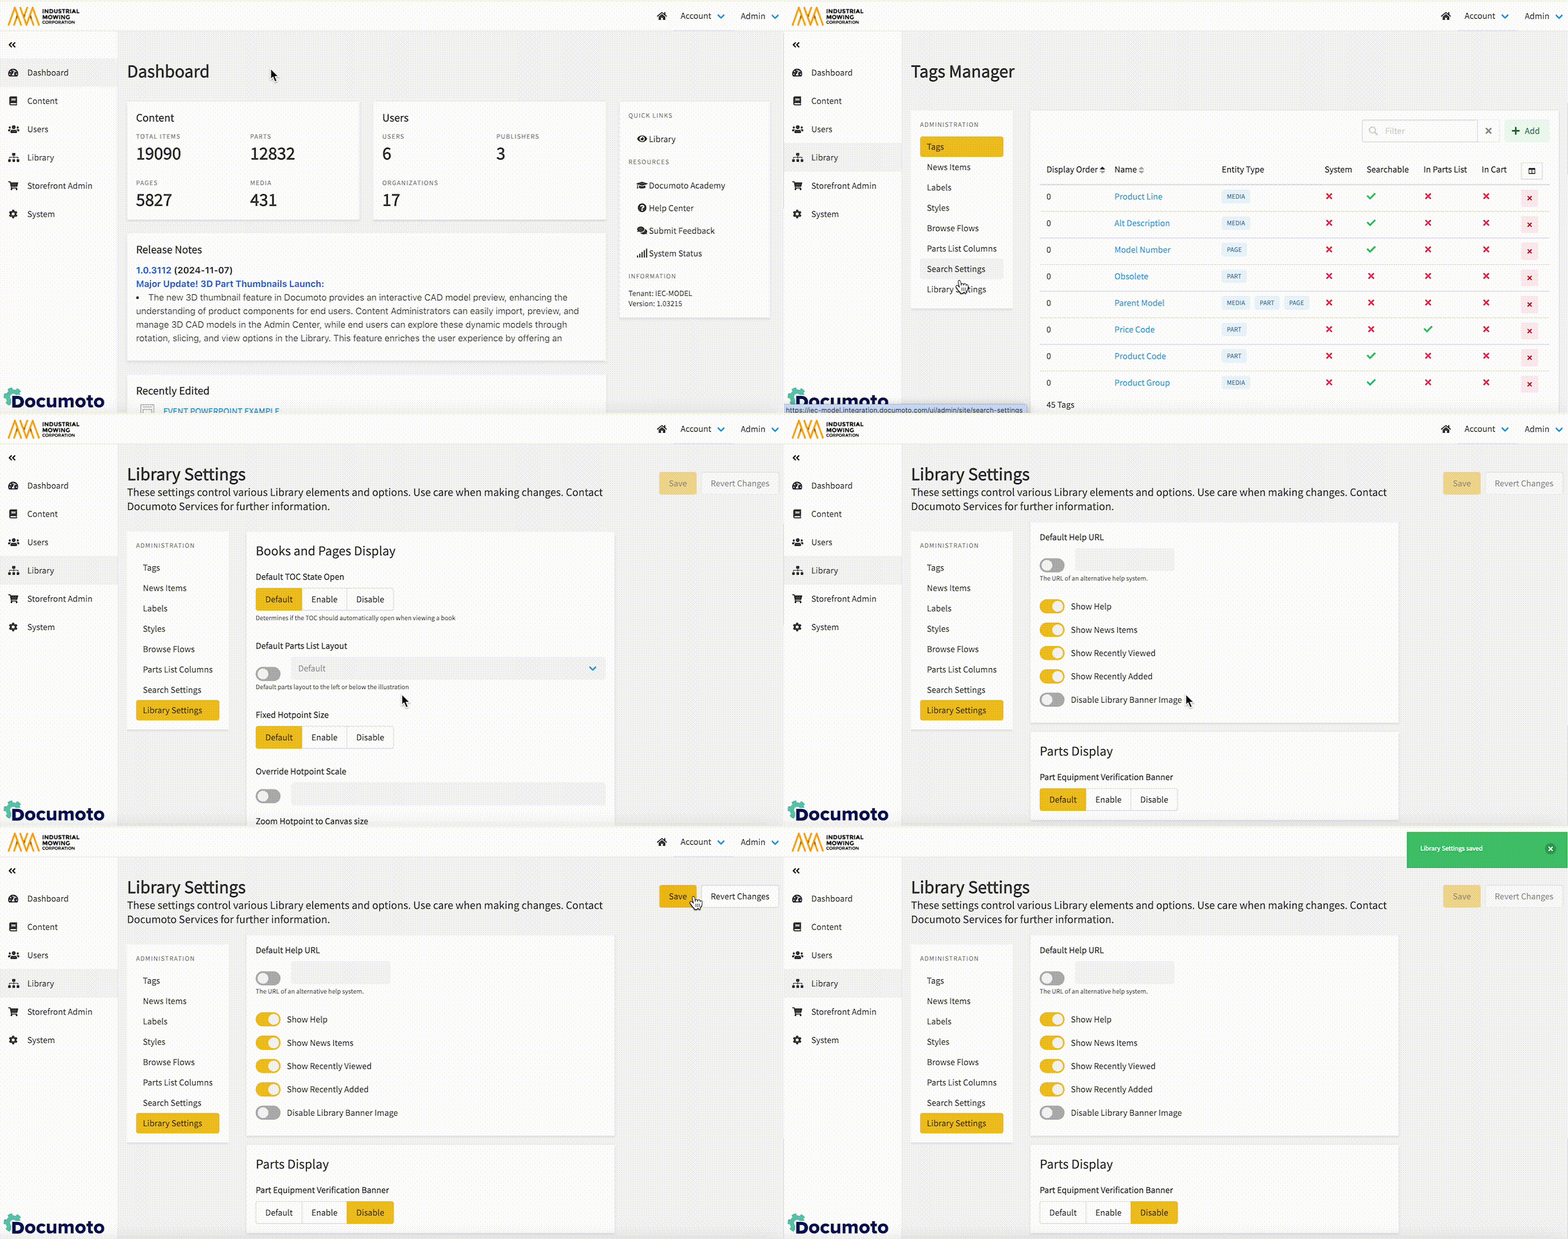
- Within the Documoto Admin Center, go to Library > Library Settings > Parts Display.
- Click Disable.
- Click Save.

